
The Journal · From your first foot placements to your first tricks
The basics and tricks to get you started as a beginner
Want to learn to roll, turn or work on your first ollie? Find the basics, trick explanations and videos all in one place. Choose the chapter that matches your session.
Start the guide
Find your foot placement and control your board
Explanations and videos at your own pace
A pathway to organize your sessions

Start on a skateboard
Although challenging, skateboarding is accessible to everyone with the right foundations. It’s also one of the most rewarding sports: landing your first ollie feels just as magical as landing a 360 flip. My name is Max as skateboard coach, I’m here to make learning easier and help you progress. In this beginner’s guide, I’ll walk you through it step by step: learn how to get started, discover the essential beginner skate tricks and build your confidence with practical advice tailored to your needs.
If you're a complete beginner, I recommend first reading our complete guide for beginners to learn skateboarding.
You'll find all the resources you need to get started and move forward quickly.
This is our biggest guide yet, written as an encyclopaedia to help you progress in skateboarding as much as possible.
So take a look and let us know what you think!
Skateboarding is boundless
What makes skateboarding so special? You can do it almost anywhere! You don’t need to live next to a skatepark: flat ground and a skateboard are more than enough to learn the basics. That’s where it all starts. Once you’re comfortable on your board, you can soon try your first ollie, the fundamental trick that opens the door to countless others. With skateboarding, the possibilities are endless: let your creativity loose and explore your limits. Ready to start? Put on your shoes, grab your board and begin your skateboard adventure today!
Where to start skateboarding?
Right from the start, you need to know whether you're goofy or regular

In skateboarding, your basic stance, called stance, depends on how you position your feet. If your left foot is in front and you push with your right, your stance is regular. Si c’est le pied droit devant et que vous poussez avec le gauche, vous êtes en goofy. Pour déterminer votre stance, le "test de la poussée" est une méthode simple et efficace : tenez-vous droit(e) sur une surface plane, et demandez à quelqu’un de vous pousser légèrement dans le dos en fermant les yeux. Le pied qui se place en avant pour maintenir votre équilibre sera généralement votre pied avant sur la planche. Vous pouvez aussi essayer de vous pencher en avant par vous-même ou monter sur la planche et tester les deux positions pour voir laquelle est la plus naturelle.
Once you've found your stance, it's time to learn to ride. Place your front foot firmly on the board over the front bolts, with your toes pointing slightly towards the nose (the front of the board). Then put your back foot on the ground right beside the board and push gently to move forward. The harder and faster you push, the more speed you'll gain. Tip for learning safely: push twice, then put your back foot on the board.
Once you feel comfortable with your speed, place your back foot on the tail, the back of the board. To prepare for tricks such as the ollie, rotate your front foot so it is parallel to your back foot. With these basics, you’re ready to explore everything skateboarding has to offer!
Regular
Left foot in front
Top view · arrow indicates frontGoofy
Right foot in front
Top view · arrow indicates frontTurn
Now that you're moving, it's time to learn to turn and stop: essential skills for mastering skateboarding. Turning is relatively simple, and there are 2 ways to turn your skateboard.
The first: simply lean slightly onto your toes or heels to tilt the board and steer. If your trucks are loose, turns will be easier and smoother. For skaters regular, pressing through your toes turns you right, while pressing through your heels turns you left. For skaters goofy, it's the opposite. If your trucks are tight, you'll need to press harder to start a turn, and the pressure you apply determines how sharp it is. However, watch out for wheel bites : if the deck touches your wheels during a sharp turn, it can bring you to an abrupt stop.
The second way to turn is to press down on the tail, the back of the board. This takes a little more confidence because you need to lift the front wheels. The technique is to use your shoulders to turn the skateboard as you lift the wheels. Press down on the back as your hand passes in front of your eyes. It’s about coordination. The best advice for learning safely is to start while stationary and make small movements to build confidence before trying a half-turn in one go.
Stop
To slow down or stop, the simplest and safest method for beginners is to use your back foot as a brake. Take it off the board and put it on the ground beside you, letting your heel drag gently to reduce speed. The more pressure you apply, the faster you slow down. If you need an emergency stop, it is sometimes better to step straight off the board. For more advanced skaters, techniques such as powerslides also enable you to stop effectively while maintaining control. With practice, these skills will become natural and allow you to ride with confidence!
See this publication on InstagramA publication shared by Old Skullz Skateboard (@oldskullzskateboard)
Your playground: Where can you skate?
If you wonder "Where can I skate safely and progress ?", don’t worry: you can skateboard almost anywhere, provided you choose the right place. To begin, choose a flat, clear surface with no cars or fragile obstacles. Skateparks are ideal for this: they offer spaces designed for skateboarding, often in concrete, one of the best surfaces to ride on. At the skatepark, however, respect other skaters, especially the more experienced ones, by staying out of their lines and away from behind obstacles. Take the opportunity to watch, ask questions and learn from them: skateparks are also places to share and improve.
You can also skate on other surfaces, but every terrain has its own characteristics. Asphalt is often a good option, although it can have imperfections or become sticky in hot weather, making landings harder. Wooden panels work well, but watch out for gaps between boards and water that makes them slippery. Marble, while ideal for skateboarding thanks to its smooth slide, is rare and often off limits. Ramps are generally made from treated wood, plastic or metal, with the latter used for edges and copings. En résumé, choisissez un lieu adapté à votre niveau, et surtout, amusez-vous tout en respectant les autres et votre environnement !
What if I fall?
Don’t be afraid of falling: it’s an inevitable part of learning to skateboard. What matters is knowing how to fall properly to limit the risk of injury. Tense your muscles to protect your ligaments and, if possible, try to roll after the fall to spread the impact energy. This can reduce pain and prevent serious injuries. Above all, when you’re starting out, wear suitable protective gear : they're essential for skating safely and building confidence.
Here’s the essential protective equipment you need to get started:
- A helmet : it protects your head from impacts and is essential, even for pros.
- Knee pads and elbow pads : ideal for cushioning falls and preserving your kneecaps and elbows.
- Wrist guards : essential for avoiding fractures and scrapes, as hands are often the first things to hit the ground.
Don’t let anyone convince you that protective gear isn’t “cool”. What really not cool, is getting injured and being kept away from skateboarding as a result. By adopting these good habits from the start, you'll gain confidence and be able to progress calmly while minimising the risks.
What equipment to buy?
Got a taste for skateboarding and ready to get started? It's time to think about the essential gear. Alongside the protective gear you need and shoes designed for skateboarding, the main item is, of course, your board. Choosing the right skateboard is crucial for making progress easier and getting the most from your sessions.
To help you, contact us directly or consult our online shop : we'll be happy to help you choose a board that suits your level, style of skating and specific needs. Whether you're a beginner or looking to upgrade your equipment, we'll guide you step by step towards the best choice and the best possible start.
The first skateboard trick: the Ollie
Once you're comfortable riding, it's time to move on to the next step: learn your first tricks. Et le meilleur point de départ est le Ollie. Ce trick fondamental est la base de presque toutes les figures en skateboard, il est donc essentiel de le maîtriser correctement avant de progresser.
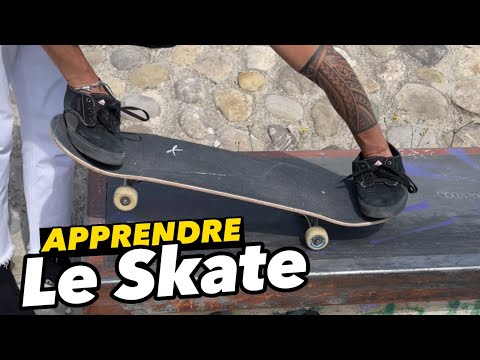 DO THIS to learn skateboarding | OLLIEPlay video · Old Skullz Skateboard
Starting position for the Ollie:
- Back foot : Place it in the centre of the tail (the back end of the board), neither too far left nor too far right.
- Front foot : Position it just behind the front bolts, ready to slide.
The steps to achieve an Ollie:
- Pop the tail : Press firmly on the tail with your back foot until it touches the ground.
- Slide the front foot : at the same time, slide your front foot up and towards the front of the board to level it out. Use the edge of your sole for better traction on the grip tape.
This is where proper skate shoes matter: they're designed to withstand grip tape abrasion, unlike regular trainers or sports shoes, which wear out quickly.
Landing safely: bringing the board down
Once your board takes off, keep your feet well above it for a stable landing. Don't worry if your first Ollies are low or short: this is quite normal. With practice, you will gain in height and control, opening the door to more advanced tricks.
With patience and persistence, the ollie will become second nature and help you progress quickly as you learn to skateboard.
Expand your range of tricks: Pop Shove-It
The Pop Shove-It is an essential trick that combines the movement of an ollie with a 180-degree board rotation. As you perform it, the nose of your skateboard makes a semicircle in front of you, switching the nose and tail positions. Although technical, this trick is accessible with some practice and a good understanding of foot placement and timing.
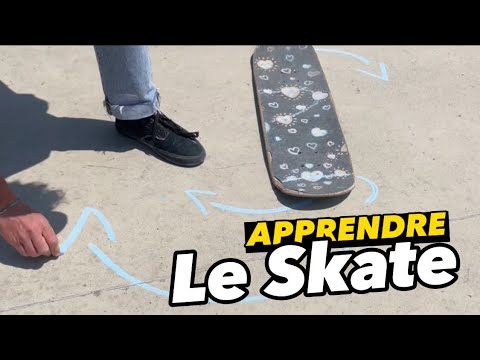 DO THIS to Learn to Skateboard | POP SHOVE ITPlay video · Old Skullz Skateboard
Foot placement for the pop shove-it:
- Back foot : place it in the “pocket” of the tail, the curved area near the edge. Your toes should sit almost at the very end of the board, giving you more control over the rotation.
- Front foot : Keep it slightly behind the front bolts, as you would for an Ollie, ready to follow the movement.
Steps to a successful Pop Shove-It:
- Pop the tail and create the rotation : as you press down on the tail, push backwards with your back foot to start the board rotating through 180 degrees. This movement is key to creating the circular motion.
- Slide the front foot : as with an ollie, slide your front foot towards the nose to stabilize the board. This helps you maintain control during the rotation.
- The “pop” : add a little upward impulse by snapping the tail down, allowing the board to rise and rotate at the same time.
Landing:
When the board finishes rotating, “catch” it with your feet to stabilise it in the air. Let your knees flex to absorb the landing, land firmly and keep rolling smoothly.
By mastering the Pop Shove-It, you open the door to a wide variety of more complex tricks. With practice, this movement will become a versatile weapon in your skater's repertoire!
The foundation of fakie tricks: the Fakie Ollie
The Fakie Ollie follows the principle of a regular ollie, with one small difference: you are rolling backward, or “fakie”. This reversed direction adds a challenge, making the trick a little harder to master. However, with good foot placement and regular practice, it will become a solid foundation for all your fakie tricks.
Foot position for Fakie Ollie:
- Back foot : place it in the centre of the tail (now at the front, since you're riding fakie).
- Front foot : position it just above the front bolts, ready to slide and stabilise the board.
Steps to land a Fakie Ollie:
- Pop the tail : As with a regular ollie, press down firmly on the tail with your back foot (the leading foot when riding fakie) to lift the board off the ground.
- Slide the front foot : Slide your front foot backwards (or rather towards the nose in this reversed setup) to level the board out in the air.
- Align shoulders : To avoid unforeseen rotations, keep your shoulders aligned with the board throughout the trick.
Landing:
Landing fakie can be trickier than landing a regular ollie. Make sure you land firmly with your feet directly over the bolts for maximum stability. Bend your knees slightly to absorb the impact and keep rolling smoothly.
Why master the Fakie Ollie?
This trick is more than just a variation: it underpins all other fakie tricks and adds style to your repertoire. Once mastered, it opens the door to more advanced tricks and lets you explore more creativity in your skateboarding.
Enjoy your training and let Fakie Ollie enrich your style and possibilities!
Your first rotations: BS 180
The Backside 180 (or BS 180) is an essential trick that combines style and technique. Once you’re comfortable with the ollie, it’s a great way to expand your repertoire and add energy to your skating. Here’s everything you need to know to land it.
See this publication on InstagramA publication shared by Old Skullz Skateboard (@oldskullzskateboard)
Understanding Backside 180:
- Backside refers to the direction of rotation: your back is oriented towards the direction of movement during rotation.
- Regular : turn clockwise.
- Goofy : turn counterclockwise.
- 180 means you make a half-rotation: a full half-turn with both your board and your body.
Foot positioning:
Foot placement is the same as for the ollie:
- Back foot : placed in the centre of the tail, ready to snap it down to start the jump.
- Front foot : just behind the front bolts, ready to slide and stabilise the board.
Steps to achieve a BS 180:
- Preparation with shoulders : Before jumping, start turning your shoulders in the direction of rotation (backward). The shoulders play a key role in giving your body and board momentum.
- Pop the tail : Ollie while initiating the rotation with your shoulders. This naturally brings your hips and board around in the same direction.
- Turn the board : push the tail slightly backwards with your back foot to help the board rotate 180 degrees. Your front foot should follow and guide the board to keep it aligned beneath your feet.
- Jump high : A powerful impulse is essential to a successful BS 180. The higher you jump, the more time you have to complete the rotation.
Landing:
- Once the rotation is complete, land with your feet centred over the bolts for more stability.
- Bend the knees lightly to cushion the impact and maintain a good balance.
Tips for Success:
- Timing : Coordinate the tail snap, your shoulder movement and the board's rotation perfectly.
- Commitment : Do not hold back; a hesitant pop will make the trick harder to complete.
- Practice : The BS 180 may seem technical, but with repetition it will become a natural and fluid movement.
The backside 180 is a versatile trick you can do on flat ground, downhill or even over a gap. Take your time, enjoy practicing it and add style to every rotation!
Next level: the kickflip
The Kickflip: the iconic skateboard trick
The Kickflip is probably one of skateboarding’s most iconic and recognizable tricks. Popularized in the 1970s by the legendary Rodney Mullen, it has become a real rite of passage for skaters. So much so that the expression "Do a kickflip!" has almost become a mantra for testing or motivating a rider. So why not learn to master this iconic trick and impress your friends?
What is a Kickflip?
The Kickflip is a trick where your board makes a complete rotation on its longitudinal axis. Cela signifie que le nose (the front of the board) stays at the front throughout the movement, while the grip tape (the top of the board) temporarily faces down during the rotation.
- In a kickflip, the board rotates towards the skater.
- On the other hand, in a heelflip, it turns in the opposite direction.
 Exercises to learn the kickflip easily as a beginner (tips)Play video · Old Skullz Skateboard
Preparation and position of feet
- Back foot : Place your back foot in the centre of the tail, as you would for an Ollie. It provides the pop and starts the jump.
- Front foot : Position your front foot at a slight angle towards the outer, heel-side edge, with less of your foot on the board than for a regular ollie. This lets you perform the “flick” needed for the rotation.
How to do a kickflip?
- Pop the tail : a Kickflip starts like an Ollie. Press firmly on the tail with your back foot until it touches the ground. This makes the board leave the ground.
- The "flick" : instead of sliding your front foot straight towards the nose as in an ollie, move it diagonally towards the outer edge (heel side). This diagonal movement makes the board flip.
- Use the edge of your sole for better control during the flick.
- Do not force the movement too much to avoid excessive rotation.
- Observation and "catch" : Once the board completes its rotation and the grip tape reappears, catch it with your feet in mid-air (the catch).
- Landing : land with your feet ideally over the bolts for greater stability and to avoid breaking the board. Bend your knees slightly to absorb the impact.
Tips for landing your Kickflip
- Precision of the flick : The angle and strength of the flick determine the rotation speed. An overly wide or uncontrolled movement can unbalance your board.
- Total commitment : Do not hold back, even if several attempts fail. Confidence is essential for progress.
- Repetition : like any technical trick, the kickflip takes practice. Give it time to refine your movements and coordinate everything.
- Suitable footwear : Skate shoes are essential for good grip and to avoid wearing out too quickly.
The kickflip is much more than just a trick: it's a statement of style and skill in skateboarding. Once you've mastered it, you'll open the door to countless variations and combos. So put on your protective gear, grab your board and start kickflipping!
One of the fundamentals: the Heelflip
Preparation: Position of feet and shoulders
- Back foot : Place it in the centre of the tail, as you would for an Ollie. This foot generates the pop and helps lift the board off the ground.
- Front foot : Position it just behind the front bolts, letting your toes hang slightly over the edge of the board. This placement is essential for creating the flick with your heel.
- Position of shoulders : Keep your shoulders aligned with the board to maintain your balance and guide the rotation correctly.
See this publication on InstagramA publication shared by Old Skullz Skateboard (@oldskullzskateboard)
How do you do a heelflip?
- The pop (take-off) : Start the trick as you would an ollie. Press down firmly on the tail with your back foot to lift the board off the ground. The stronger the pop, the smoother and bigger your heelflip will be.
- The flick (rotation) : Once the board is in the air, use the heel of your front foot to push the outside edge of the board downwards.
- The movement must be rapid and accurate to generate a clean rotation.
- Be sure to maintain good coordination between pop and flick.
- Observation : Keep an eye on the board as it rotates. As soon as the grip tape (the top of the board) comes back into view, prepare to land.
- The catch and the landing : Grab the board with your feet when the rotation is complete. Land with your feet ideally positioned above screws for better stability. Bend your knees slightly to absorb the impact.
Tips for landing your heelflip
- Confidence and commitment : As with any trick, don't hold back. Momentum and coordination are key.
- Master the Kickflip first : If you are comfortable with the Kickflip, the Heelflip movement will seem more natural.
- Synchronization : Work on the timing between pop and flick to avoid an incomplete or off-balance rotation.
- Regular practice : some skaters find the heelflip harder than the kickflip, but consistent practice will help you master it quickly.
- Choose the right spot : Flat, even ground is ideal for practising this trick.
Why learn Heelflip?
The Heelflip is not only a fundamental trick, it's also incredibly multipurpose and fits easily into trick combinations or street lines. Mastering both the kickflip and the heelflip shows technical versatility that will impress at spots and skateparks.
So put on your best skate shoes, be patient, and add the Heelflip to your bag of tricks!
5 tips for progress in skateboarding
 THE ONE THING TO KNOW IF YOU WANT TO PROGRESS IN SKATEBOARDINGPlay video · Old Skullz Skateboard
Fancy something new? Move on to nollie tricks
Have you mastered Ollies, Fakie Ollies, BS 180s and Pop Shove-Its? Congratulations! If these tricks are becoming routine, it's time for a new challenge by moving on to tricks in Nollie.
The Nollie (or nose ollie) is an exciting variation that lets you rediscover the basics from a different angle. Although it may look simple, it requires good coordination and complete control of your balance.
What is a Nollie?
The Nollie follows the same principle as the Ollie, but this time uses the nose (the front of the board) to generate the pop. This trick is the the key to all nollie tricks, it is therefore essential to master it well before you venture further.
Position of feet for a Nollie
- Front foot : Place it in the centre of the board’s nose. This is the foot that generates the pop, so make sure it is positioned correctly.
- Back foot : position it just in front of the tail bolts. This foot follows the movement to level the board once it's in the air.
How to do a nollie?
- The pop : press firmly on the nose with your front foot to lift the board off the ground. Applying the right amount of pressure is crucial for a smooth Nollie.
- The slide : As the nose touches the ground, slide your back foot towards the nose to level out the board in the air.
- Landing : once the board is level, land with your feet ideally over the bolts for maximum stability. As always, bend your knees slightly to absorb the impact.
Why is the Nollie so difficult?
The Nollie can feel confusing at first, even for experienced skaters. The reverse position (using the nose rather than the tail) and the unfamiliar foot coordination can make it feel as though you’re starting from scratch. But don’t be discouraged: it’s a natural stage in your progression.
Tips for mastering the Nollie
- Start slowly : Do not try to jump high from the beginning. Focus on movement and balance.
- Commit fully : A hesitant pop will make your Nollie inaccurate. Press down on the nose with confidence.
- Find the right timing : Synchronization between pop and slide is crucial. Work on this aspect for smoother Nollies.
- Practice regularly : as with every trick, consistent practice is key. Repeat Nollies until they become second nature.
Why learn Nollie?
The Nollie opens the door to a host of new tricks and lines. It is the indispensable basis for more advanced tricks such as the Nollie Flip, the Nollie 360 Shove-It, or variations on curbs and over gaps. It's also a great way to add style and variety to your skate sessions.
So grab your board, find a quiet spot and take on this new challenge with enthusiasm. The nollie is difficult, but that makes your progress all the more rewarding. Have fun and skate with passion!
Coach’s tip: Have fun making progress
 Only 1% of skaters do this... and it works!Play video · Old Skullz Skateboard
A trick for experienced skaters: the 360 Shove-It
Try the 360 shove-it, a trick packed with style and technical skill!
Have you mastered your Pop Shove-Its and want to take things up a level? The 360 Shove-It is a great challenge for experienced skaters ready to push their limits. This impressive trick involves rotating your board on 360 degrees horizontally, while staying perfectly aligned to land facing the direction you’re traveling. Sounds simple? Not so fast! It takes practice and plenty of patience to master.
Preparation and position of feet
- Back foot : place it in the tail's “pocket”, with your toes hanging slightly over the edge. This position lets you generate maximum pressure to rotate the board in one smooth 360° movement.
- Front foot : place it at a slight diagonal, just above the front bolts. This foot stays still during the trick to prevent an accidental flip, but it plays a key role in guiding and stabilizing the board in the air.
Execution of the 360 Shove-It
- Powerful impulse with the back foot : press firmly on the tail and quickly pull your back foot backwards to initiate a full rotation of the board. This movement gives it the speed it needs for the 360° rotation.
- Control with front foot : while the board rotates, keep your front foot above it, ready to guide and stabilise it. If needed, use that foot to “catch” the board once it has completed the rotation.
- Landing : Aim to land with your feet over the bolts for maximum stability. As always, bend your knees slightly to absorb the impact.
Tips for success
- Timing and fluidity : Timing the back foot's push with the front foot's guidance is crucial.
- Stay focused : Keep your weight evenly distributed over the board to avoid veering off in an unwanted direction.
- Start slowly : Work first on a Pop Shove-It with a slightly larger rotation before attempting the 360°.
- Patience : This trick takes practice, even for experienced skaters. Keep at it and celebrate every bit of progress.
Why learn the 360 Shove-It?
The 360 Shove-It is a real test of control and precision. In addition to being spectacular, it strengthens your technique, improves your coordination and opens the way to even more impressive variations like the 360 Flip. C’est un must-have in the bag of tricks of any skater looking to shine on curbs, over gaps or simply during sessions with friends.
So grab your board, find a good spot and practice this distinctive trick. The 360 shove-it is demanding, but once you’ve got it, it brings huge satisfaction... and plenty of style!
Take it to the next level: the treflip or 360 flip
Learn the 360 Flip: the ultimate trick combining style and technical skill
The 360 Flip, also called "Tre Flip", is a combination of 360 Shove-It and the Kickflip. Ce trick emblématique est un véritable défi, même pour les skateurs expérimentés, mais il est aussi incroyablement gratifiant à maîtriser. Avant de vous y attaquer, assurez-vous d’être à l’aise avec les bases : le 360 Shove-It and the Kickflip.
 TUTORIAL | How to do a 360 FlipPlay video · Old Skullz Skateboard
Foot placement for the 360 Flip
- Back foot : place it in the tail's “pocket”, with your toes hanging slightly over the edge. This position lets you apply the pressure needed to initiate the 360° rotation and the flip at the same time.
- Front foot : position it as you would for a Kickflip, at a slight angle behind the front bolts, without overdoing the “flick”. The front foot's role is to give just enough impulse to complete the flip while guiding the board.
Steps to land the 360 Flip
- Powerful impulse with the back foot : Press down firmly on the tail and sweep your back foot backwards, as you would for a 360 shove-it. This starts the board's full rotation.
- A subtle flick with the front foot : as the board begins to rotate, make a Kickflip motion diagonally towards the outer edge. Control the flick to avoid over-rotation or a flip that's too fast.
- Observation and control : Keep your eyes on the board. As soon as you see the grip tape reappear, get your feet ready to land.
- Catch and landing : catch the board with your front foot once the rotation is complete, then bring your back foot into place. Land with your feet over the bolts for better stability, and bend your knees slightly to absorb the impact.
Tips for landing the 360 flip
- Work on your timing : Timing the front-foot flick with the rotation generated by your back foot is essential. Too much or too little force can throw the trick off balance.
- Practice at low speed : Practice at low speed to better control the board and adjust your technique.
- Patience and perseverance : This trick is complex and takes time. Even pros like Aurélien Giraud perfected it through hours of practice.
- Use a flat spot : A smooth, flat surface is ideal for learning this trick without distractions.
Why master the 360 Flip?
The 360 Flip is much more than just a trick: it's a true symbol of mastery in skateboarding. It combines technique, power and style, making it a must to impress during sessions with friends or in contests. Once you have integrated it into your repertoire, you can adapt it to many obstacles and surfaces, such as curbs, gaps or even downhill.
So put on your helmet, grab your skateboard and start learning the 360 Flip. Vous êtes à quelques replaquages de devenir une légende sur votre spot local !
Skateboarding lessons to help you improve
A professional skate coach to help you: Max Cherarak
Max is a qualified professional who supports you in person or remotely through My skate coach His coaching platform.
He supports skaters, as well as anyone who wants to grow, progress and live better. With 17 years of activity and several thousand people supported, his unique experience has helped him develop an exceptional teaching approach. Today he shares his work through videos you can use in everyday life. He applies these methods himself, both physically and mentally, so he can experience the results before giving advice.
A training session for skaters with Mon Coach Skate
 HOW TO IMPROVE AT SKATEBOARDING QUICKLYPlay video · Old Skullz Skateboard
10 easy tricks for beginners
Skateboarding has no limits. There are countless tricks you can do without knowing how to Ollie: the casper, the flip flap, the manual… and thousands more. Here are some suggested tricks for beginner skaters.
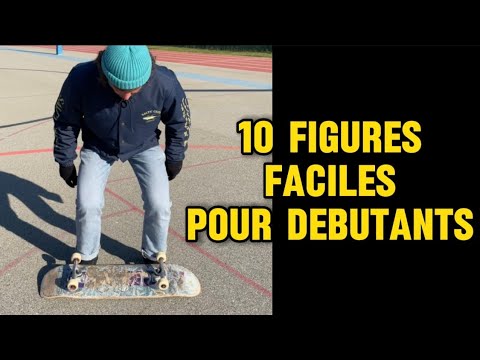 10 EASY TRICKS FOR BEGINNERSPlay video · Old Skullz Skateboard
This article will be expanded and updated over time, so stick around! In the meantime go to our channel for learn skate easily !
The Coach's Eye: Max Cherarak launches the Mon Coach Skate platform
Max Cherarak is a professional coach with multiple qualifications who has dedicated his life to skateboarding. This documentary highlights how skaters are supported as they progress.
 Skaters: athletes on their own against everyone?Play video · Old Skullz Skateboard
The role of protective gear for beginners
When you start skating, protective gear is strongly recommended. Seulement doit on uniquement se reposer sur elles ou est il également important de savoir se rattraper ?
In this video we discuss the theme of protective gear. Le coach apporte un point de vue nuancé pour pouvoir progresser en skate en toute sécurité.
Wearing protective gear is recommended to help you feel confident, especially when you are starting skateboarding.
 Do you have to wear PROTECTIVE GEAR when skateboarding?Play video · Old Skullz Skateboard